Did you know that on 31 May and 1 June 1916, the fleets of Britain and Germany engaged in the largest naval battle of the First World War?
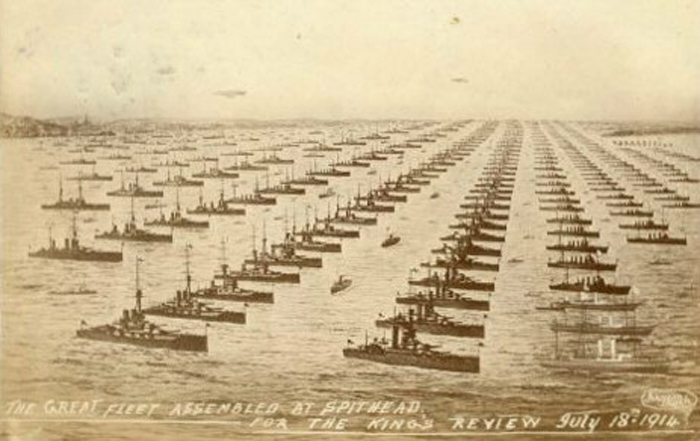
The British Fleet in 1914, before the outbreak of the First World War
When the ships of Britain’s Grand Fleet engaged those of Germany’s High Seas Fleet of the coast of Denmark what followed was a battle with the potential to change the outcome of the war.
In the years before the First World War, Britain had been the preeminent naval power on the planet. The Naval Defence Act of 1889 formalised what became known as the ‘Two Power Standard’. This stated that the strength of the Royal Navy must be that of the combined power of the next two largest navies. By pledging this, Britain ensured that it would continually maintain control of the oceans and ensure the defence of both the British Isles and the Empire, even in the event of an unfriendly alliance declaring war.
However, the British development of a new type of warship put this dominance in jeopardy.
HMS Dreadnought
Evolutions in weapons and armour at the end of the 19th century had begun to influence naval tactics in large fleet engagements. During the Russo-Japanese War battles such as the Yellow Sea showed the benefits of being able to hit enemy ships at increasingly long distances before closing to short range. In response, Britain began the process of developing the most advanced battleship ever designed.
Work on HMS Dreadnought began in October 1905 with the laying-down of her keel. After only four months of construction, she was launched in February 1906, before completing sea trials and being launched formally in December of the same year. The ship had taken a little over a year to construct and was armed with 12-inch guns capable of firing at great distances. The launch of the Dreadnought immediately made all other ships obsolete. Britain had taken possession of the future of naval warfare but had also greatly under-mined their own strength.
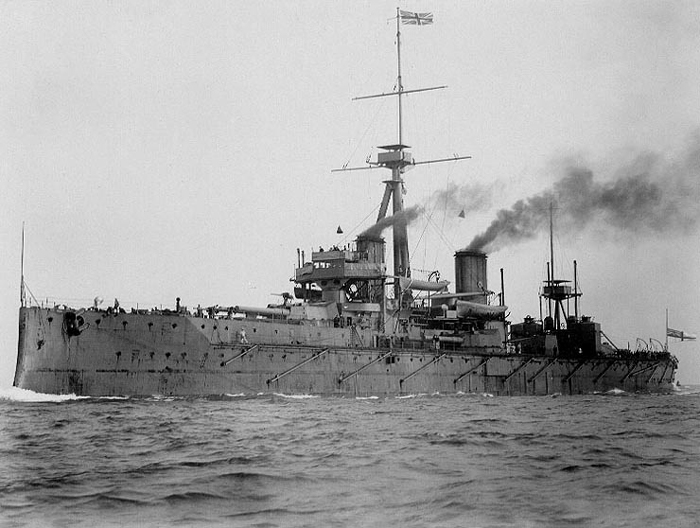
HMS Dreadnought in 1906
To challenge the British, unfriendly nations would not need to collect old ships. They would simply need to build Dreadnought-class ships as quickly as possible.
Kaiser Wilhelm II had long wished for Germany to become a major naval power, and now it appeared the opportunity had come. Germany, however, made some slight adjustments to their version of the Dreadnought‘s design in producing the SMS Nassau. Because of the size and weight of the various armour and armaments that could be attached to a ship of this size, trade-offs often had to be made in regards to overall weight and speed. The British decided to forego heavier armour to enable their ships to travel faster and therefore close the gap with the enemy quicker. The Germans, by contrast, opted for heavier armour and a lower overall speed.
What followed was a naval arms race between Britain and Germany, two of the major economic and industrial powers in the world. The tensions that had already been building between the two countries greatly increased and, at the outbreak of the First World War in 1914, the fleets of both nations had grown to huge sizes. Britain had constructed 22 Dreadnought Battleships in service and were building a further 13. Germany had 15 afloat and another 5 under construction. Britain also had 9 Battlecruisers in service, 40 pre-Dreadnought Battleships, 121 Cruisers in all categories, and 221 Destroyers. Germany had 5 Battlecruisers and 22 pre-Dreadnought Battleships along with 40 Cruisers, and 90 Destroyers.
It was thought a major naval battle was inevitable.
However, for two years this battle did not transpire.
Jutland
At the outbreak of the First World War, both Britain and Germany recognised that, rather than having everything to gain by engaging in a decisive naval battle, both had everything to lose. Still, by maintaining their fleets but not actively seeking conflict neither nation could easily claim full control of the seas.
Britain restricted its operations to maintaining a naval blockade of Germany that prevented ships reaching Germany with food or supplies. Germany, by contrast, had focused on utilising their U-Boat submarines to sink ships in the Atlantic ocean to try and prevent Britain and France gaining the materiel needed to wage war. Whilst this was going on, the two opposing fleets maintained their distance, with British vessels stationed at Scapa Flow and the Firth of Forth, and Germany’s High Seas Fleet in position in Wilhelmshaven.
However, following ongoing protests from neutral countries over the German’s policy of U-Boat warfare, which culminated in the ‘Sussex Pledge‘ to no longer attack innocent ships, the German navy decided to try and lure the British fleet into a trap.
In advance of taking their fleet to sea, the Germans placed U-Boats at strategic points around the bases of the Royal Navy in the hope of sinking ships that came out to meet the Germans. The British, however, had spotted the increased U-Boat activity and, by virtue of a captured German code book, were able to intercept German radio messages detailing the plans to set sail.
As the German fleet, under the command of Vice-Admiral Scheer, began to get under way, reports from their hidden U-Boats suggested that the British had sailed from the Firth of Forth and formed into two separate groups to attempt to meet them. This was exactly as the Germans wanted; they could attempt to destroy each group in turn with their full force. However, the U-Boats had been mistaken in their reading of the direction the British ships were sailing.
The Royal Navy was under the command of Admiral Jellicoe, with Vice-Admiral Beatty in command of Britain’s battlecruiser section. Beatty had led his troops out of Firth and was heading eastwards when given orders to turn to the north and link up with Jellicoe’s Grand Fleet which had left Scapa Flow. If Beatty had not changed his course he would likely have sailed directly into the German trap.
-
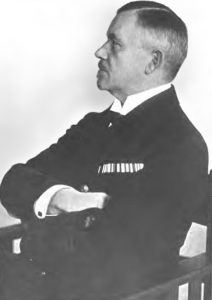
- Admiral Scheer, commander of the German Fleet

-

- Admiral Jellicoe, commander of the British Grand Fleet

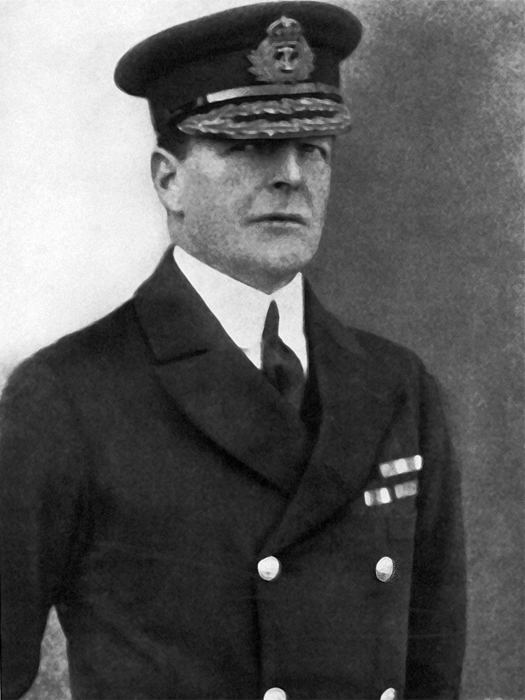
-

- Admiral Beatty, commander of the British battlecruiser force
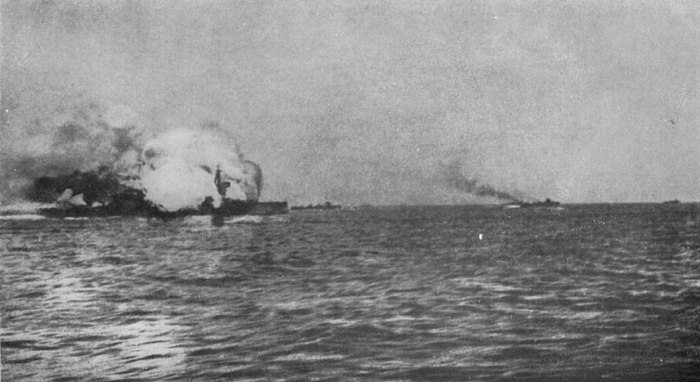
With visibility hampered by bad conditions, Beatty’s scouts spotted the German ships, and he moved his fleet to cut the German fleet off from their home-base and keep them out to sea. Beatty’s ships could fire at far greater range than the German vessels he was facing and he significantly outnumbered the group currently opposing him. Despite this, he held fire for 15 minutes rather than press his temporary advantage. When the fighting began, it was the Germans who had the benefits of position and conditions.
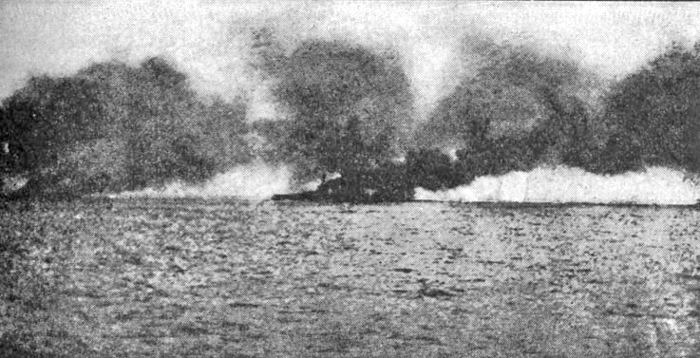
HMS Lion, Beatty’s flagship on fire
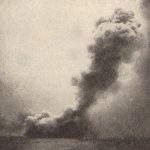
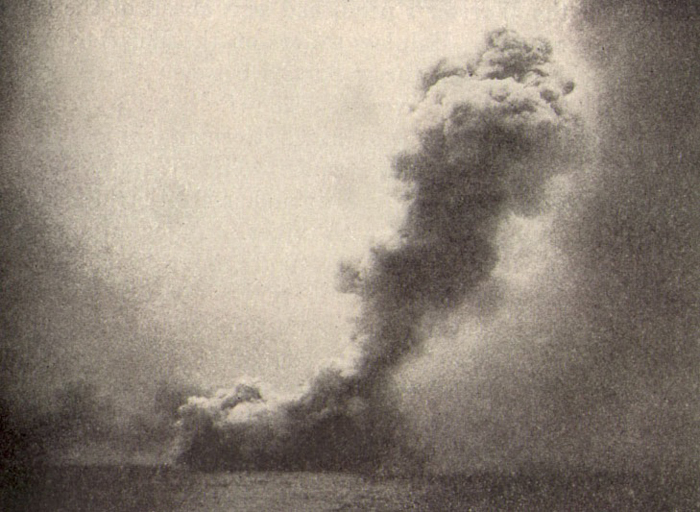
Admiral Beatty’s flagship HMS Lion was hit repeatedly and only saved from destruction when the order was given to close the secure doors between armament magazines, shortly before a fire in one of them could have exploded the ship. The nearby ships HMS Indefatigable and HMS Queen Mary were not so fortunate and both ships exploded and sank under heavy fire.
Upon sighting the rest of the German High Seas Fleet converging on his position, Beatty gave the order to withdraw towards the north and Admiral Jellicoe’s ships. This retreat was carried out under heavy German fire, which caused further damage and loss of life, and both HMS Defence and HMS Invincible were destroyed in the running battles. The German design of their Dreadnought-class ships with heavier armour and a lower speed was paying dividends. Beatty’s earlier decision not to open fire at greater range had robbed him of one of his main advantages and the German ships were able to sustain more damage up close than their British equivalents.
During this fighting the HMS Chester came under heavy fire that killed or badly wounded its entire gun crew. When the ship’s medics arrived they found the sole survivor to be 16 year old Jack Cornwell who, despite having metal splinters embedded in his chest, was still manning the gun and awaiting further orders. The ship was sent back to port with the wounded onboard and Cornwell died on 2nd June. He was later awarded the Victoria Cross.
Admiral Jellicoe had no clear information of the location of the German fleet or Beatty’s retreating forces. If he was to engage the enemy in strength, he needed to change his formation into a ‘fighting line’ and then, if possible, perform a manoeuvre known as ‘crossing the T’ where his fleet could sail across the path of the Germans and bring all of their guns to bear.
-
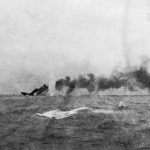
- HMS Indefatigable sinking
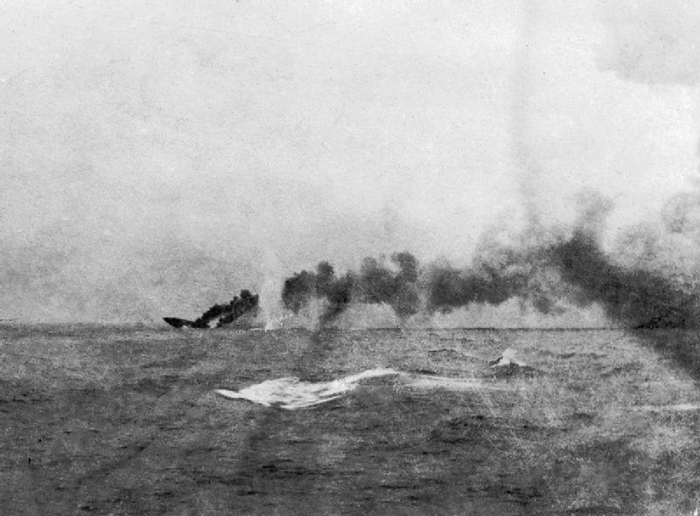
-
- HMS Invincible exploding
-
- The destruction of HMS Queen Mary
Jellicoe succeeded in doing this at 18:30 to the almost complete surprise of the German fleet who had not only failed to realise that Jellicoe’s Grand Fleet was in the immediate area, they had also not realised the entire fleet had been put to sea. Realising they were sailing towards certain destruction, the German commander Admiral Scheer ordered his ships to turn 180 degrees away from the British and disengage.
As night fell, both fleets began to consider their options. Admiral Jellicoe knew that his ships were not designed to operate in darkness, and Admiral Scheer had decided he had nothing to gain by continuing the battle and sought to escape before sunrise.
Scheer took the decision to change the course of his fleet and cut across the wake left by the British ships and sneak through behind them. Throughout the night, British ships to the south searched for the German fleet, whilst British ships to the north at the rear of the formation encountered them in the darkness but failed to properly relay this information to Jellicoe.
When the sun rose on 1 June 1916, it was clear that the two fleets had largely avoided each other in the night and the Germans had successfully escaped.
The battle was over.
Aftermath
The British had long been hoping for a ‘Trafalgar moment’ where their Royal Navy would annihilate the opposition fleet and secure a war-defining naval victory. In the aftermath of the battle, it became clear that this had not happened.
Indeed, when the various losses were tallied up it was also clear that the British had fared much worse in the battle than the Germans had. The British had lost 3 Battlecruisers, 3 Armoured Cruisers and 8 Destroyers, with 6,097 personnel killed and a further 510 wounded. The Germans, by comparison, had lost 1 Pre-Dreadnought ship, 1 Battlecruiser, 4 Light Cruisers and 5 Destroyers, with 2,551 personnel killed and another 507 personnel wounded. Kaiser Wilhelm promptly claimed a proud victory for Germany that was celebrated until after the end of the Second World War.

German U-Boats in port
Admiral Scheer, however, was not so sure. His ongoing plan had been to use his fleet to whittle down the numbers of British fighting ships without ever allowing the British to achieve parity of numbers in battle or outnumber him. This had clearly not been a success at Jutland. More to the point, whilst the British had lost more ships they could afford such losses. The Germans could not, and they could not easily replace ships lost in battle whilst the Royal Navy maintained an active blockade against them.
The status quo from before the battle with British and German fleets remaining at anchor once again took over, but in this instance it was rapidly clear that the arrangement was far more beneficial for the British. They were able to maintain the naval blockade that was slowly starving Germany of food and resources, whilst the Germans abandoned hope of defeating the Royal Navy in a single battle.
Instead, following further setbacks at Verdun and the Somme in 1916, Germany reneged on its agreement with the Sussex Pledge and once again began unrestricted U-Boat warfare in an attempt to defeat Britain from beneath the waves.
This decision, along with diplomatic blunders in 1917, would bring the United States of America into the war on the side of Britain and France.